敏感数据或过多的内存消耗:有充分的理由想要更改 Git 历史记录。 在这篇博文中,我解释了如何使用BFG从 Git 历史记录中清除文件。 BFG 的一个弱点是缺乏对直接路径的支持,因此您无法从历史记录中专门删除子文件夹中的文件或文件夹。 有了这个,是时候寻找替代解决方案了。
除了官方不推荐的git filter branch之外,git-filter-repo也是清理历史的工具之一。 简短安装后,我们首先分析存储库并找到例如历史上最大的文件夹:
git filter-repo --analyze好在文件夹里 .git/filter-repo/analysis 生成各种TXT文件:
directories-all-sizes.txtextensions-all-sizes.txtpath-all-sizes.txt- ...
这是值得的文件 directories-all-sizes.txt 细看:
=== All directories by reverse size ===


Format: unpacked size, packed size, date deleted, directory name


  4624417043 3796607988 <present>  <toplevel>

  4475940396 3778033787 <present>  wp-content

  4060236681 3694449320 <present>  wp-content/uploads

   305163809   70576241 <present>  wp-content/plugins

   123818107   15442735 <present>  wp-includes

...
经常会发生您长期忽略并从历史记录中删除的 HEAD 数据(例如,WordPress 媒体文件夹 wp-content/uploads/ 或不小心推了一个 node_modules- 或者 vendor-粘合剂)。
一般推荐 git-filter-repo 清理后,推送到一个新的空存储库。 这里列出了许多原因, 为什么这是有道理的并避免了许多问题。 尽管如此,您可能希望推送到同一个存储库,这也可以通过一些提示来实现。
重要的是,主要的代码托管平台 的GitHub 和 GitLab 推荐不同的方法,其中一些方法彼此不同。 例如,在 GitHub 上,我们删除 wp-content/uploads/ 使用以下步骤 git-filter-repo 从历史:
mkdir tmp-repo
cd tmp-repo
git clone git@github.com:foo/bar.git .
cp .git/config /tmp/config-backup
git filter-repo --invert-paths --path wp-content/uploads/
# option 1: same repo
mv /tmp/config-backup .git/config
git push origin --force --all
# option 2: new repo
git remote add origin git@github.com:foo/bar-new.git
git push origin --force --all
cd ..
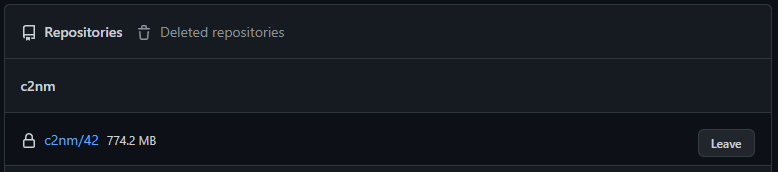
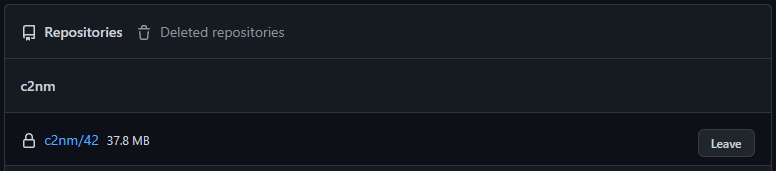
rm -rf tmp-repo我们现在还可以远程检查大小(通过 API 和 UI 更改大小可能需要长达 24 小时)。 为此,请打开存储库设置(如果存储库属于某个组织,您必须先将您自己的帐户添加到该组织)。 现在我们看到大小:
GitLab 上的程序略有不同:
mkdir tmp-repo
cd tmp-repo
# option 1: same repo
  # Settings > General > Advanced > Export project > download tar.gz file into tmp-repo
  tar xzf 20*.tar.gz
  git clone --bare --mirror project.bundle
  cd project.git
  git filter-repo --invert-paths --path wp-content/uploads/
  cp ./filter-repo/commit-map /tmp/commit-map-1
  # copying the commit-map has to be done after every single command from git filter-repo
  # you need the commit-map files later
  git remote remove origin
  git remote add origin git@gitlab.com:foo/bar.git
  # Settings > Repository > Protected branches/Protected branches >
  # enable "Allowed to force push to main/master"
  git push origin --force 'refs/heads/*'
  git push origin --force 'refs/tags/*'
  git push origin --force 'refs/replace/*'
  # Settings > Repository > Protected branches/Protected branches >
  # disable "Allowed to force push to main/master"
  date
  # wait 30 minutes (😱)
  date
  # Settings > Repository > upload /tmp/commit-map-X
# option 2: new repo
  git clone git@gitlab.com:foo/bar.git .
  git filter-repo --invert-paths --path wp-content/uploads/
  git remote add origin git@gitlab.com:foo/bar-new.git
  # Settings > Repository > Protected branches/Protected branches >
  # enable "Allowed to force push to main/master"
  git push origin --force --all
  # Settings > Repository > Protected branches/Protected branches >
  # disable "Allowed to force push to main/master"
cd ..
rm -rf tmp-repo
再等待约 5 分钟后,我们可以进入 Settings > Usage Quotas 查看存储空间:


删除后,所有相关的开发人员都参与到最后的步骤中很重要:如果用户现在使用自己的本地副本执行正常推送,这将导致大文件迁移回中央存储库。 因此,推荐以下3个选项:
- "穷人的新鲜克隆"
rm -rf .git && git clone xxx temp && mv temp/.git ./.git && rm -rf temp- 对于更改的文件(取决于应用程序):
git checkout -- .或者。git add -A . && git commit -m "Push obscure file changes." && git push
- "白手起家"
rm -rf repo && git clone xxx .
- “用变基丑陋的拉动”
git pull -r- 在这里,您仍然有未清理的历史记录,但在大多数情况下,您不再会意外地用大型本地变体覆盖远程存储库
在当前配额的过程中(特别是由于GitLab 的新限制),检查存储库历史的大小并在必要时清理它们总是值得的:
| GitHub免费 | 亚搏体育app免费 | |
| 最大文件大小限制 | 100MB | ∞ |
| 最大回购大小限制 | 5,000MB | ∞ |
| 最大回购计数限制 | ∞ | ∞ |
| 最大整体尺寸限制 | ∞ | 5,000MB |
最后,还值得看看一个自托管的免费变体,比如 吉蒂亚 扔。 不费吹灰之力就可以 非常纤薄的服务器 一个自托管的 Git 实例(每 SSL 有保障的, 备份 包括,控制 强大的API) 主持人,也很优秀 配置 并且在数据保护方面也更胜一筹。 在这里,顺便说一句,您还可以使用 git-filter-repo 简化存储库:
mkdir tmp-repo
cd tmp-repo
git clone git@git.tld.com:foo/bar.git .
cp .git/config /tmp/config-backup
git filter-repo --invert-paths --path wp-content/uploads/
# option 1: same repo
  mv /tmp/config-backup .git/config
  git push origin --mirror
  # login on the remote command line and run in the repo-folder
  sudo -u git git reflog expire --expire=now --all
  sudo -u git git gc --aggressive --prune=now
  # if you face memory limit issues, modify the git configuration
  sudo -u git git config --global pack.windowMemory "100m"
  sudo -u git git config --global pack.packSizeLimit "100m"
  sudo -u git git config --global pack.threads "1"
  # if in web ui the size does not change, make a slight
  # modification to a file and push again normally
# option 2: new repo
  git remote add origin git@git.tld.com:foo/bar-new.git
  git push origin --force --all
cd ..
rm -rf tmp-repo
这里具体是命令 sudo -u git git gc --aggressive --prune=now 重要(正在运行的 cron git gc 否则有一个太长 修剪时间 2 周)。