ទិន្នន័យរសើប ឬការប្រើប្រាស់អង្គចងចាំច្រើនពេក៖ មានហេតុផលល្អក្នុងការចង់ផ្លាស់ប្តូរប្រវត្តិ Git ។ នៅក្នុងការបង្ហោះប្លក់នេះ ខ្ញុំបានពន្យល់ពីរបៀបលុបឯកសារចេញពីប្រវត្តិ Git ដោយប្រើ BFG ។ ចំណុចខ្សោយនៃ BFG គឺកង្វះការគាំទ្រសម្រាប់ ផ្លូវផ្ទាល់ ដូច្នេះអ្នកមិនអាចលុបឯកសារ ឬថតនៅក្នុងថតរងចេញពីប្រវត្តិបានទេ។ ជាមួយនោះ វាដល់ពេលដែលត្រូវមើលដំណោះស្រាយជំនួស។
បន្ថែមពីលើ សាខាតម្រង git ដែល មិនត្រូវបានណែនាំជាផ្លូវការ នោះ git-filter-repo គឺជា ឧបករណ៍ មួយសម្រាប់សម្អាតប្រវត្តិ។ បន្ទាប់ពីការ ដំឡើង រយៈពេលខ្លី យើងវិភាគឃ្លាំងជាមុនសិន ហើយស្វែងរកឧទាហរណ៍ ថតឯកសារធំជាងគេក្នុងប្រវត្តិសាស្ត្រ:
git filter-repo --analyzeល្អនៅក្នុងថត .git/filter-repo/analysis បានបង្កើតឯកសារ TXT គ្រប់ប្រភេទ:
directories-all-sizes.txtextensions-all-sizes.txtpath-all-sizes.txt- ...
វាមានតម្លៃឯកសារ directories-all-sizes.txt មើលឱ្យកាន់តែជិត:
=== All directories by reverse size ===


Format: unpacked size, packed size, date deleted, directory name


  4624417043 3796607988 <present>  <toplevel>

  4475940396 3778033787 <present>  wp-content

  4060236681 3694449320 <present>  wp-content/uploads

   305163809   70576241 <present>  wp-content/plugins

   123818107   15442735 <present>  wp-includes

...
វាជារឿយៗកើតឡើងដែលអ្នកមិនអើពើយូរហើយបានដកចេញពីទិន្នន័យ HEAD នៅក្នុងប្រវត្តិ (ឧទាហរណ៍ ថតមេឌៀ WordPress wp-content/uploads/ ឬរុញដោយចៃដន្យ node_modules- ឬ vendor- ទ្រនាប់) ។
ជាទូទៅណែនាំ git-filter-repo បន្ទាប់ពីសម្អាត រុញទៅឃ្លាំងទទេថ្មី។ មានហេតុផលជាច្រើនដែលបានរាយនៅទីនេះ, ហេតុអ្វីបានជាវាសមហេតុផល និងជៀសវាងបញ្ហាជាច្រើន។ យ៉ាងណាក៏ដោយ វាអាចកើតឡើងដែលអ្នកចង់រុញទៅឃ្លាំងដូចគ្នា ហើយវាក៏អាចធ្វើទៅបានដោយមានតម្រុយមួយចំនួន។
សំខាន់គឺវេទិកាបង្ហោះកូដសំខាន់ៗ ជីធីហប និង GitLab សូមណែនាំវិធីសាស្រ្តផ្សេងៗគ្នា ដែលមួយចំនួនខុសគ្នាពីគ្នាទៅវិញទៅមក។ ឧទាហរណ៍នៅលើ GitHub យើងដកចេញ wp-content/uploads/ ដោយប្រើជំហានខាងក្រោម git-filter-repo ពីប្រវត្តិសាស្ត្រ:
mkdir tmp-repo
cd tmp-repo
git clone git@github.com:foo/bar.git .
cp .git/config /tmp/config-backup
git filter-repo --invert-paths --path wp-content/uploads/
# option 1: same repo
mv /tmp/config-backup .git/config
git push origin --force --all
# option 2: new repo
git remote add origin git@github.com:foo/bar-new.git
git push origin --force --all
cd ..
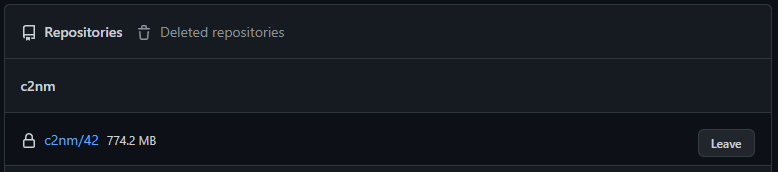
rm -rf tmp-repoឥឡូវនេះ យើងក៏អាចពិនិត្យមើលទំហំពីចម្ងាយផងដែរ (ការផ្លាស់ប្តូរទំហំតាមរយៈ API ហើយនៅក្នុង UI អាចចំណាយពេលរហូតដល់ 24 ម៉ោង)។ ដើម្បីធ្វើដូចនេះបើក ការកំណត់ឃ្លាំង (ប្រសិនបើឃ្លាំងជាកម្មសិទ្ធិរបស់ស្ថាប័នមួយ អ្នកត្រូវតែបន្ថែមគណនីផ្ទាល់ខ្លួនរបស់អ្នកទៅអង្គការជាមុនសិន)។ ឥឡូវនេះយើងឃើញទំហំ:
នីតិវិធីគឺខុសគ្នាបន្តិចបន្តួចនៅលើ GitLab:
mkdir tmp-repo
cd tmp-repo
# option 1: same repo
# Settings > General > Advanced > Export project > download tar.gz file into tmp-repo
tar xzf 20*.tar.gz
git clone --bare --mirror project.bundle
cd project.git
git filter-repo --invert-paths --path wp-content/uploads/
cp ./filter-repo/commit-map /tmp/commit-map-1
# copying the commit-map has to be done after every single command from git filter-repo
# you need the commit-map files later
git remote remove origin
git remote add origin git@gitlab.com:foo/bar.git
# Settings > Repository > Protected branches/Protected branches >
# enable "Allowed to force push to main/master"
git push origin --force 'refs/heads/*'
git push origin --force 'refs/tags/*'
git push origin --force 'refs/replace/*'
# Settings > Repository > Protected branches/Protected branches >
# disable "Allowed to force push to main/master"
date
# wait 30 minutes (😱)
date
# Settings > Repository > upload /tmp/commit-map-X
# option 2: new repo
git clone git@gitlab.com:foo/bar.git .
git filter-repo --invert-paths --path wp-content/uploads/
git remote add origin git@gitlab.com:foo/bar-new.git
# Settings > Repository > Protected branches/Protected branches >
# enable "Allowed to force push to main/master"
git push origin --force --all
# Settings > Repository > Protected branches/Protected branches >
# disable "Allowed to force push to main/master"
cd ..
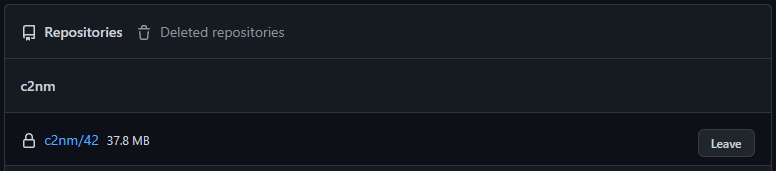
rm -rf tmp-repoបន្ទាប់ពីរង់ចាំ ~ 5 នាទីទៀតយើងអាចទៅក្រោម Settings > Usage Quotas មើលទំហំផ្ទុក:


បន្ទាប់ពីការដកចេញ វាជាការសំខាន់ដែលអ្នកអភិវឌ្ឍន៍ទាំងអស់ដែលពាក់ព័ន្ធត្រូវចូលរួមនៅក្នុងជំហានចុងក្រោយ៖ ប្រសិនបើអ្នកប្រើឥឡូវនេះធ្វើការជំរុញធម្មតាជាមួយនឹងច្បាប់ចម្លងក្នុងស្រុករបស់ពួកគេ វានឹងនាំឱ្យឯកសារធំផ្លាស់ទីត្រឡប់ទៅឃ្លាំងកណ្តាលវិញ។ ដូច្នេះជម្រើស 3 ខាងក្រោមត្រូវបានណែនាំ:
- "ក្លូនស្រស់របស់បុរសក្រីក្រ"
rm -rf .git && git clone xxx temp && mv temp/.git ./.git && rm -rf temp- សម្រាប់ឯកសារដែលបានផ្លាស់ប្តូរ (អាស្រ័យលើកម្មវិធី):
git checkout -- .ឬ។git add -A . && git commit -m "Push obscure file changes." && git push
- "ចាប់ផ្តើមពីដំបូង"
rm -rf repo && git clone xxx .
- "ទាញអាក្រក់ជាមួយ rebase"
git pull -r- នៅទីនេះអ្នកនៅតែមានប្រវត្តិមិនស្អាត ប៉ុន្តែក្នុងករណីភាគច្រើន អ្នកលែងសរសេរជាន់លើឃ្លាំងពីចម្ងាយដោយចៃដន្យជាមួយនឹងវ៉ារ្យ៉ង់ក្នុងស្រុកធំទៀតហើយ
នៅក្នុងវគ្គនៃកូតាបច្ចុប្បន្ន (ជាពិសេសដោយសារតែការ រឹតបន្តឹងថ្មីនៃ GitLab ) វាតែងតែមានតម្លៃពិនិត្យមើលទំហំនៃប្រវត្តិនៃឃ្លាំងរបស់អ្នក និងសម្អាតពួកវាប្រសិនបើចាំបាច់។:
| GitHub ឥតគិតថ្លៃ | GitLab ឥតគិតថ្លៃ | |
| ដែនកំណត់ទំហំឯកសារអតិបរមា | 100 មេកាបៃ | ∞ |
| ដែនកំណត់ទំហំ repo អតិបរមា | 5,000 មេកាបៃ | ∞ |
| ដែនកំណត់ការរាប់ឡើងវិញអតិបរមា | ∞ | ∞ |
| ដែនកំណត់ទំហំអតិបរមា | ∞ | 5,000 មេកាបៃ |
ជាចុងក្រោយ វាក៏មានតម្លៃផងដែរក្នុងការមើលការបង្ហោះដោយខ្លួនឯង វ៉ារ្យ៉ង់ឥតគិតថ្លៃដូចជា ហ្គីតា ដើម្បីបោះ។ ជាមួយនឹងការខិតខំប្រឹងប្រែងតិចតួចអ្នកអាចនៅលើ server ស្ដើងណាស់។ ឧទាហរណ៍ Git ដែលបង្ហោះដោយខ្លួនឯង (GUI per SSL ធានា, ការបម្រុងទុក រួមបញ្ចូល, គ្រប់គ្រង API ដ៏មានអានុភាព) ម្ចាស់ផ្ទះដែលល្អផងដែរ។ កំណត់រចនាសម្ព័ន្ធ ហើយក៏ល្អលើសពីការការពារទិន្នន័យ។ នៅទីនេះដោយវិធីនេះអ្នកក៏អាចប្រើផងដែរ។ git-filter-repo គ្រាន់តែសម្រួលដល់ឃ្លាំង:
mkdir tmp-repo
cd tmp-repo
git clone git@git.tld.com:foo/bar.git .
cp .git/config /tmp/config-backup
git filter-repo --invert-paths --path wp-content/uploads/
# option 1: same repo
  mv /tmp/config-backup .git/config
  git push origin --mirror
  # login on the remote command line and run in the repo-folder
  sudo -u git git reflog expire --expire=now --all
  sudo -u git git gc --aggressive --prune=now
  # if you face memory limit issues, modify the git configuration
  sudo -u git git config --global pack.windowMemory "100m"
  sudo -u git git config --global pack.packSizeLimit "100m"
  sudo -u git git config --global pack.threads "1"
  # if in web ui the size does not change, make a slight
  # modification to a file and push again normally
# option 2: new repo
  git remote add origin git@git.tld.com:foo/bar-new.git
  git push origin --force --all
cd ..
rm -rf tmp-repo
នៅទីនេះជាពិសេសគឺពាក្យបញ្ជា sudo -u git git gc --aggressive --prune=now សំខាន់ ( cron កំពុងរត់ git gc បើមិនដូច្នេះទេ មានមួយវែងពេក ពេលកាត់ចេញ នៃ 2 សប្តាហ៍) ។