உணர்திறன் தரவு அல்லது அதிக நினைவக நுகர்வு: Git வரலாற்றை மாற்ற விரும்புவதற்கு நல்ல காரணங்கள் உள்ளன. இந்த வலைப்பதிவு இடுகையில் , BFG ஐப் பயன்படுத்தி Git வரலாற்றிலிருந்து கோப்புகளை எவ்வாறு அகற்றுவது என்பதை விளக்கினேன். BFG இன் பலவீனமான புள்ளி நேரடி பாதைகளுக்கான ஆதரவு இல்லாதது, எனவே வரலாற்றிலிருந்து துணை கோப்புறைகளில் உள்ள கோப்புகள் அல்லது கோப்புறைகளை நீங்கள் குறிப்பாக அகற்ற முடியாது. அதனுடன், மாற்று தீர்வுகளைப் பார்க்க வேண்டிய நேரம் இது.
அதிகாரப்பூர்வமாக பரிந்துரைக்கப்படாத git வடிகட்டி கிளைக்கு கூடுதலாக , git-filter-repo என்பது வரலாற்றை சுத்தம் செய்வதற்கான கருவிகளில் ஒன்றாகும். ஒரு குறுகிய நிறுவலுக்குப் பிறகு, நாங்கள் முதலில் களஞ்சியத்தை பகுப்பாய்வு செய்து, எடுத்துக்காட்டாக, வரலாற்றில் மிகப்பெரிய கோப்புறைகளைக் கண்டுபிடிப்போம்:
git filter-repo --analyzeகோப்புறையில் நன்றாக இருங்கள் .git/filter-repo/analysis அனைத்து வகையான TXT கோப்புகளையும் உருவாக்கியது:
directories-all-sizes.txtextensions-all-sizes.txtpath-all-sizes.txt- ...
இது கோப்புக்கு மதிப்புள்ளது directories-all-sizes.txt உன்னிப்பாக பார்த்தல்:
=== All directories by reverse size ===


Format: unpacked size, packed size, date deleted, directory name


  4624417043 3796607988 <present>  <toplevel>

  4475940396 3778033787 <present>  wp-content

  4060236681 3694449320 <present>  wp-content/uploads

   305163809   70576241 <present>  wp-content/plugins

   123818107   15442735 <present>  wp-includes

...
வரலாற்றில் உள்ள HEAD தரவை நீங்கள் நீண்ட காலமாகப் புறக்கணித்து அகற்றிவிட்டீர்கள் (எடுத்துக்காட்டாக, வேர்ட்பிரஸ் மீடியா கோப்புறை wp-content/uploads/ அல்லது தற்செயலாக தள்ளப்பட்ட ஒன்று node_modules- அல்லது vendor-பைண்டர்).
பொதுவாக பரிந்துரைக்கிறது git-filter-repo சுத்தம் செய்த பிறகு, ஒரு புதிய, காலியான களஞ்சியத்திற்கு தள்ளப்படுகிறது. இங்கே பட்டியலிடப்பட்டுள்ள பல காரணங்கள் உள்ளன, இது ஏன் அர்த்தமுள்ளதாக இருக்கிறது மற்றும் பல சிக்கல்களைத் தவிர்க்கிறது. ஆயினும்கூட, நீங்கள் அதே களஞ்சியத்திற்கு தள்ள விரும்புவது நடக்கலாம், அதுவும் சில குறிப்புகள் மூலம் சாத்தியமாகும்.
முக்கியமாக, முக்கிய குறியீடு ஹோஸ்டிங் தளங்கள் கிட்ஹப் மற்றும் GitLab வெவ்வேறு அணுகுமுறைகளை பரிந்துரைக்கின்றன, அவற்றில் சில ஒருவருக்கொருவர் வேறுபடுகின்றன. எடுத்துக்காட்டாக, GitHub இல் அகற்றுவோம் wp-content/uploads/ பின்வரும் படிகளைப் பயன்படுத்தி git-filter-repo வரலாற்றில் இருந்து:
mkdir tmp-repo
cd tmp-repo
git clone git@github.com:foo/bar.git .
cp .git/config /tmp/config-backup
git filter-repo --invert-paths --path wp-content/uploads/
# option 1: same repo
mv /tmp/config-backup .git/config
git push origin --force --all
# option 2: new repo
git remote add origin git@github.com:foo/bar-new.git
git push origin --force --all
cd ..
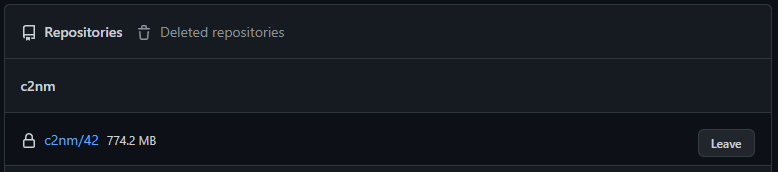
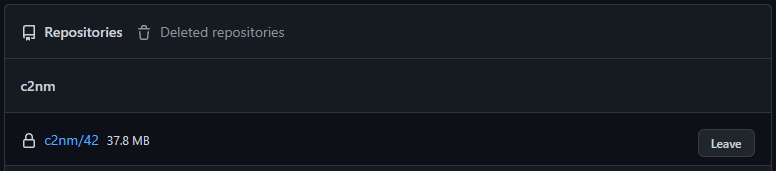
rm -rf tmp-repoஇப்போது தொலைவிலிருந்து அளவைச் சரிபார்க்கலாம் (API மற்றும் UI மூலம் அளவை மாற்ற 24 மணிநேரம் வரை ஆகலாம்). இதைச் செய்ய, களஞ்சிய அமைப்புகளைத் திறக்கவும் (களஞ்சியம் ஒரு நிறுவனத்திற்கு சொந்தமானது என்றால், முதலில் உங்கள் சொந்த கணக்கை நிறுவனத்தில் சேர்க்க வேண்டும்). இப்போது நாம் அளவைக் காண்கிறோம்:
GitLab இல் செயல்முறை சற்று வித்தியாசமானது:
mkdir tmp-repo
cd tmp-repo
# option 1: same repo
  # Settings > General > Advanced > Export project > download tar.gz file into tmp-repo
  tar xzf 20*.tar.gz
  git clone --bare --mirror project.bundle
  cd project.git
  git filter-repo --invert-paths --path wp-content/uploads/
  cp ./filter-repo/commit-map /tmp/commit-map-1
  # copying the commit-map has to be done after every single command from git filter-repo
  # you need the commit-map files later
  git remote remove origin
  git remote add origin git@gitlab.com:foo/bar.git
  # Settings > Repository > Protected branches/Protected branches >
  # enable "Allowed to force push to main/master"
  git push origin --force 'refs/heads/*'
  git push origin --force 'refs/tags/*'
  git push origin --force 'refs/replace/*'
  # Settings > Repository > Protected branches/Protected branches >
  # disable "Allowed to force push to main/master"
  date
  # wait 30 minutes (😱)
  date
  # Settings > Repository > upload /tmp/commit-map-X
# option 2: new repo
  git clone git@gitlab.com:foo/bar.git .
  git filter-repo --invert-paths --path wp-content/uploads/
  git remote add origin git@gitlab.com:foo/bar-new.git
  # Settings > Repository > Protected branches/Protected branches >
  # enable "Allowed to force push to main/master"
  git push origin --force --all
  # Settings > Repository > Protected branches/Protected branches >
  # disable "Allowed to force push to main/master"
cd ..
rm -rf tmp-repo
மற்றொரு ~5 நிமிட காத்திருப்புக்குப் பிறகு நாம் கீழே செல்லலாம் Settings > Usage Quotas சேமிப்பக இடத்தைப் பார்க்கவும்:


அகற்றப்பட்ட பிறகு, சம்பந்தப்பட்ட அனைத்து டெவலப்பர்களும் இறுதிப் படிகளில் ஈடுபடுவது முக்கியம்: ஒரு பயனர் இப்போது தங்கள் சொந்த உள்ளூர் நகலைக் கொண்டு சாதாரண புஷ் செய்தால், பெரிய கோப்புகள் மீண்டும் மையக் களஞ்சியத்திற்கு இடம்பெயர்வதற்கு வழிவகுக்கும். எனவே, பின்வரும் 3 விருப்பங்கள் பரிந்துரைக்கப்படுகின்றன:
- "ஏழையின் புதிய குளோன்"
rm -rf .git && git clone xxx temp && mv temp/.git ./.git && rm -rf temp- மாற்றப்பட்ட கோப்புகளுக்கு (பயன்பாட்டைப் பொறுத்து):
git checkout -- .அல்லது.git add -A . && git commit -m "Push obscure file changes." && git push
- "முதலிலிருந்து துவங்கு"
rm -rf repo && git clone xxx .
- "அசிங்கமான இழுவை மறுதளத்துடன்"
git pull -r- இங்கே நீங்கள் இன்னும் சுத்தம் செய்யப்படாத வரலாற்றைக் கொண்டிருக்கிறீர்கள், ஆனால் பெரும்பாலான சந்தர்ப்பங்களில் நீங்கள் தற்செயலாக தொலைநிலைக் களஞ்சியத்தை பெரிய உள்ளூர் மாறுபாட்டுடன் மேலெழுத முடியாது.
தற்போதைய ஒதுக்கீட்டின் போது (குறிப்பாக GitLab இன் புதிய கட்டுப்பாடுகள் காரணமாக), உங்கள் களஞ்சியங்களின் வரலாற்றின் அளவை எப்போதும் சரிபார்த்து, தேவைப்பட்டால் அவற்றை சுத்தம் செய்வது மதிப்பு.:
| GitHub இலவசம் | GitLab இலவசம் | |
| அதிகபட்ச கோப்பு அளவு வரம்பு | 100எம்பி | ∞ |
| அதிகபட்ச ரெப்போ அளவு வரம்பு | 5,000எம்பி | ∞ |
| அதிகபட்ச ரெப்போ எண்ணிக்கை வரம்பு | ∞ | ∞ |
| அதிகபட்ச மொத்த அளவு வரம்பு | ∞ | 5,000எம்பி |
இறுதியாக, சுயமாக ஹோஸ்ட் செய்யப்பட்ட, இலவச மாறுபாட்டைப் பார்ப்பது மதிப்புக்குரியது கீதேயா வீசுவதற்கு. சிறிய முயற்சியால் உங்களால் முடியும் மிகவும் மெலிதான சர்வர் ஒரு சுய-ஹோஸ்ட் செய்யப்பட்ட Git நிகழ்வு (GUI per SSL பாதுகாப்பானது, காப்பு உட்பட, கட்டுப்பாடு சக்திவாய்ந்த API) புரவலன், இதுவும் சிறப்பானது கட்டமைக்க மேலும் தரவு பாதுகாப்பின் அடிப்படையில் சிறந்ததாகும். இங்கே, மூலம், நீங்கள் பயன்படுத்தலாம் git-filter-repo வெறுமனே களஞ்சியங்களை நெறிப்படுத்துங்கள்:
mkdir tmp-repo
cd tmp-repo
git clone git@git.tld.com:foo/bar.git .
cp .git/config /tmp/config-backup
git filter-repo --invert-paths --path wp-content/uploads/
# option 1: same repo
  mv /tmp/config-backup .git/config
  git push origin --mirror
  # login on the remote command line and run in the repo-folder
  sudo -u git git reflog expire --expire=now --all
  sudo -u git git gc --aggressive --prune=now
  # if you face memory limit issues, modify the git configuration
  sudo -u git git config --global pack.windowMemory "100m"
  sudo -u git git config --global pack.packSizeLimit "100m"
  sudo -u git git config --global pack.threads "1"
  # if in web ui the size does not change, make a slight
  # modification to a file and push again normally
# option 2: new repo
  git remote add origin git@git.tld.com:foo/bar-new.git
  git push origin --force --all
cd ..
rm -rf tmp-repo
இங்கே குறிப்பாக கட்டளை உள்ளது sudo -u git git gc --aggressive --prune=now முக்கியமானது (கிரான் இயங்கும் git gc மற்றபடி ஒன்று மிக நீளமாக உள்ளது கத்தரிக்காய் நேரம் 2 வாரங்கள்).