機密データまたはメモリ消費量が多すぎる: Git の履歴を変更する十分な理由があります。 このブログ投稿では、 BFGを使用して Git 履歴からファイルをパージする方法を説明しました。 BFG の弱点は、ダイレクト パスがサポートされていないことです。そのため、サブフォルダー内のファイルまたはフォルダーを履歴から明確に削除することはできません。 それで、代替ソリューションを検討する時が来ました。
公式に推奨されていないgit filter branchに加えて、 git-filter-repoは履歴をクリーンアップするためのツールの 1 つです。 短いインストールの後、まずリポジトリを分析し、たとえば、履歴の中で最大のフォルダーを見つけます:
git filter-repo --analyzeまあ、フォルダにある .git/filter-repo/analysis あらゆる種類のTXTファイルを生成:
directories-all-sizes.txtextensions-all-sizes.txtpath-all-sizes.txt- ...
ファイルの価値がある directories-all-sizes.txt もっとよく見なさい:
=== All directories by reverse size ===


Format: unpacked size, packed size, date deleted, directory name


  4624417043 3796607988 <present>  <toplevel>

  4475940396 3778033787 <present>  wp-content

  4060236681 3694449320 <present>  wp-content/uploads

   305163809   70576241 <present>  wp-content/plugins

   123818107   15442735 <present>  wp-includes

...
履歴の HEAD データ (たとえば、WordPress メディア フォルダー wp-content/uploads/ または誤って押されたもの node_modules- また vendor-バインダー)。
一般的に推奨 git-filter-repo クリーニング後、新しい空のリポジトリにプッシュします。 ここにリストされている多くの理由があります, なぜこれが理にかなっており、多くの問題を回避するのか. それにもかかわらず、同じリポジトリにプッシュしたい場合があり、それもいくつかのヒントで可能です。
重要なのは、主要なコード ホスティング プラットフォーム GitHub と GitLab いくつかの異なるアプローチを推奨します。 たとえば、GitHub では削除します wp-content/uploads/ 次の手順を使用して git-filter-repo 歴史から:
mkdir tmp-repo
cd tmp-repo
git clone git@github.com:foo/bar.git .
cp .git/config /tmp/config-backup
git filter-repo --invert-paths --path wp-content/uploads/
# option 1: same repo
mv /tmp/config-backup .git/config
git push origin --force --all
# option 2: new repo
git remote add origin git@github.com:foo/bar-new.git
git push origin --force --all
cd ..
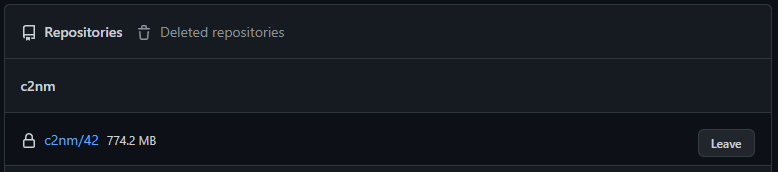
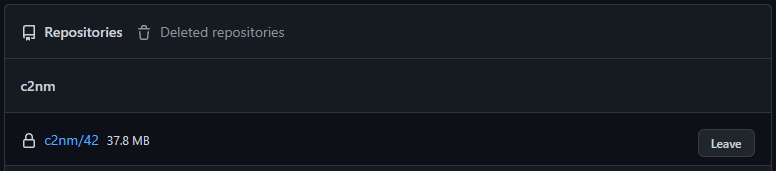
rm -rf tmp-repoリモートでサイズを確認することもできるようになりました (API および UI でサイズを変更するには、最大 24 時間かかる場合があります)。 これを行うには、リポジトリ設定を開きます (リポジトリが組織に属している場合は、最初に自分のアカウントを組織に追加する必要があります)。 これでサイズがわかります:
GitLab では手順が少し異なります:
mkdir tmp-repo
cd tmp-repo
# option 1: same repo
  # Settings > General > Advanced > Export project > download tar.gz file into tmp-repo
  tar xzf 20*.tar.gz
  git clone --bare --mirror project.bundle
  cd project.git
  git filter-repo --invert-paths --path wp-content/uploads/
  cp ./filter-repo/commit-map /tmp/commit-map-1
  # copying the commit-map has to be done after every single command from git filter-repo
  # you need the commit-map files later
  git remote remove origin
  git remote add origin git@gitlab.com:foo/bar.git
  # Settings > Repository > Protected branches/Protected branches >
  # enable "Allowed to force push to main/master"
  git push origin --force 'refs/heads/*'
  git push origin --force 'refs/tags/*'
  git push origin --force 'refs/replace/*'
  # Settings > Repository > Protected branches/Protected branches >
  # disable "Allowed to force push to main/master"
  date
  # wait 30 minutes (😱)
  date
  # Settings > Repository > upload /tmp/commit-map-X
# option 2: new repo
  git clone git@gitlab.com:foo/bar.git .
  git filter-repo --invert-paths --path wp-content/uploads/
  git remote add origin git@gitlab.com:foo/bar-new.git
  # Settings > Repository > Protected branches/Protected branches >
  # enable "Allowed to force push to main/master"
  git push origin --force --all
  # Settings > Repository > Protected branches/Protected branches >
  # disable "Allowed to force push to main/master"
cd ..
rm -rf tmp-repo
さらに 5 分ほど待つと、下に移動できます Settings > Usage Quotas 収納スペースを見る:


削除後、関係するすべての開発者が最終ステップに関与することが重要です。ユーザーが自分のローカル コピーを使用して通常のプッシュを実行すると、大きなファイルが中央リポジトリに移行されます。 したがって、次の 3 つのオプションをお勧めします。:
- "貧乏人の新鮮なクローン"
rm -rf .git && git clone xxx temp && mv temp/.git ./.git && rm -rf temp- 変更されたファイルの場合 (アプリケーションによって異なります):
git checkout -- .また。git add -A . && git commit -m "Push obscure file changes." && git push
- "ゼロから始めます"
rm -rf repo && git clone xxx .
- 「リベースで醜いプル」
git pull -r- ここにはまだクリーンアップされていない履歴がありますが、ほとんどの場合、リモート リポジトリを大きなローカル バリアントで誤って上書きすることはなくなりました。
現在のクォータの過程で (特にGitLab の新しい制限により)、リポジトリの履歴のサイズを確認し、必要に応じてそれらをクリーンアップすることは常に価値があります:
| GitHub 無料 | GitLab 無料 | |
| 最大ファイル サイズの制限 | 100MB | ∞ |
| リポジトリの最大サイズ制限 | 5,000MB | ∞ |
| 最大レポ数制限 | ∞ | ∞ |
| 全体の最大サイズ制限 | ∞ | 5,000MB |
最後に、次のような自己ホスト型の無料のバリアントも検討する価値があります。 ギテア 投げるために。 少しの努力で、 非常にスリムなサーバー セルフホステッド Git インスタンス (GUI あたり SSL 安全な, バックアップ 含まれる、制御する 強力な API)ホスト、これも優れています 構成、設定 また、データ保護の面でも優れています。 ここで、ところで、あなたも使うことができます git-filter-repo リポジトリをシンプルに合理化:
mkdir tmp-repo
cd tmp-repo
git clone git@git.tld.com:foo/bar.git .
cp .git/config /tmp/config-backup
git filter-repo --invert-paths --path wp-content/uploads/
# option 1: same repo
  mv /tmp/config-backup .git/config
  git push origin --mirror
  # login on the remote command line and run in the repo-folder
  sudo -u git git reflog expire --expire=now --all
  sudo -u git git gc --aggressive --prune=now
  # if you face memory limit issues, modify the git configuration
  sudo -u git git config --global pack.windowMemory "100m"
  sudo -u git git config --global pack.packSizeLimit "100m"
  sudo -u git git config --global pack.threads "1"
  # if in web ui the size does not change, make a slight
  # modification to a file and push again normally
# option 2: new repo
  git remote add origin git@git.tld.com:foo/bar-new.git
  git push origin --force --all
cd ..
rm -rf tmp-repo
ここに具体的なコマンドがあります sudo -u git git gc --aggressive --prune=now 重要 (実行中の cron git gc そうでなければ長すぎる 剪定時間 2 週間)。